

Just dipping your toes into the Nintendo Switch 2 pond? Dive into our guide for setting up the dock and shuffling data around!
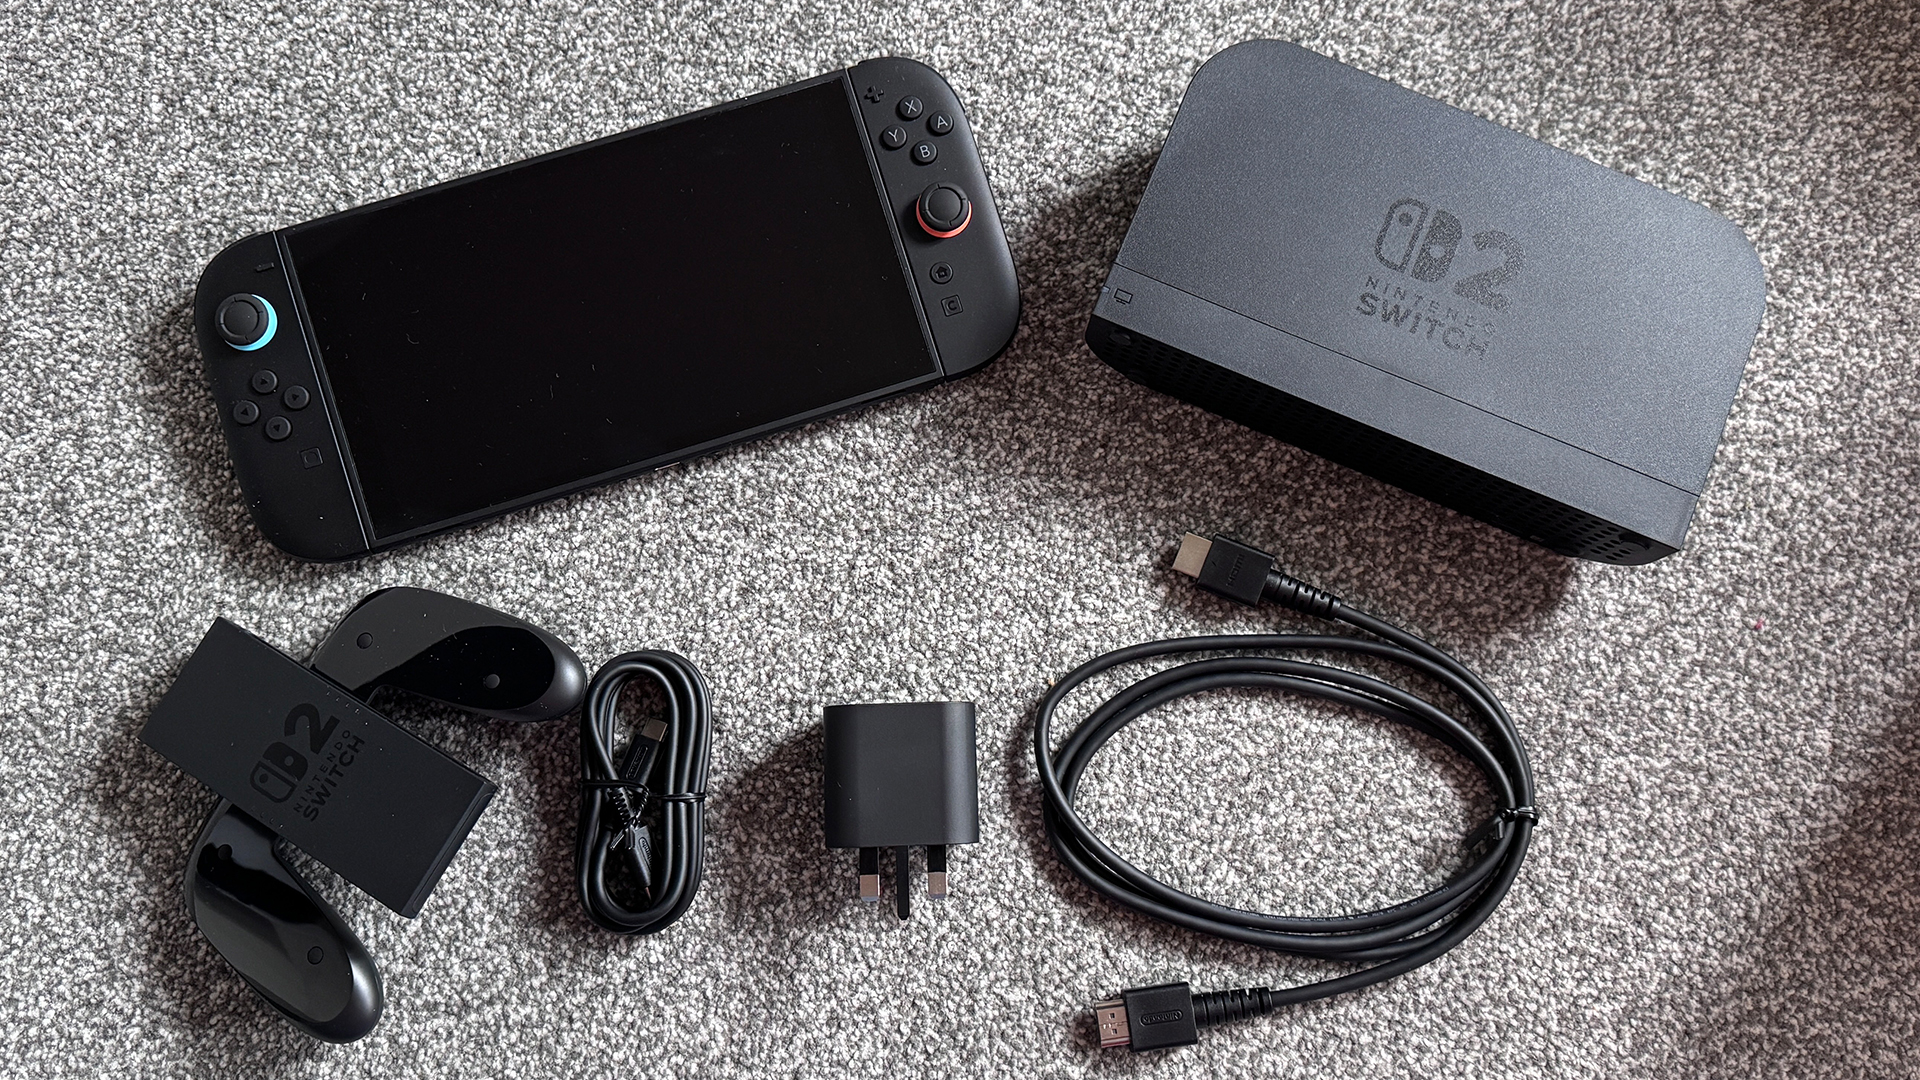
1. Unbox your Switch 2
 (Photo: © Future)
Setup essentials for your Switch 2 include the console, Joy-Con controllers, HDMI & power cables, and the dock.
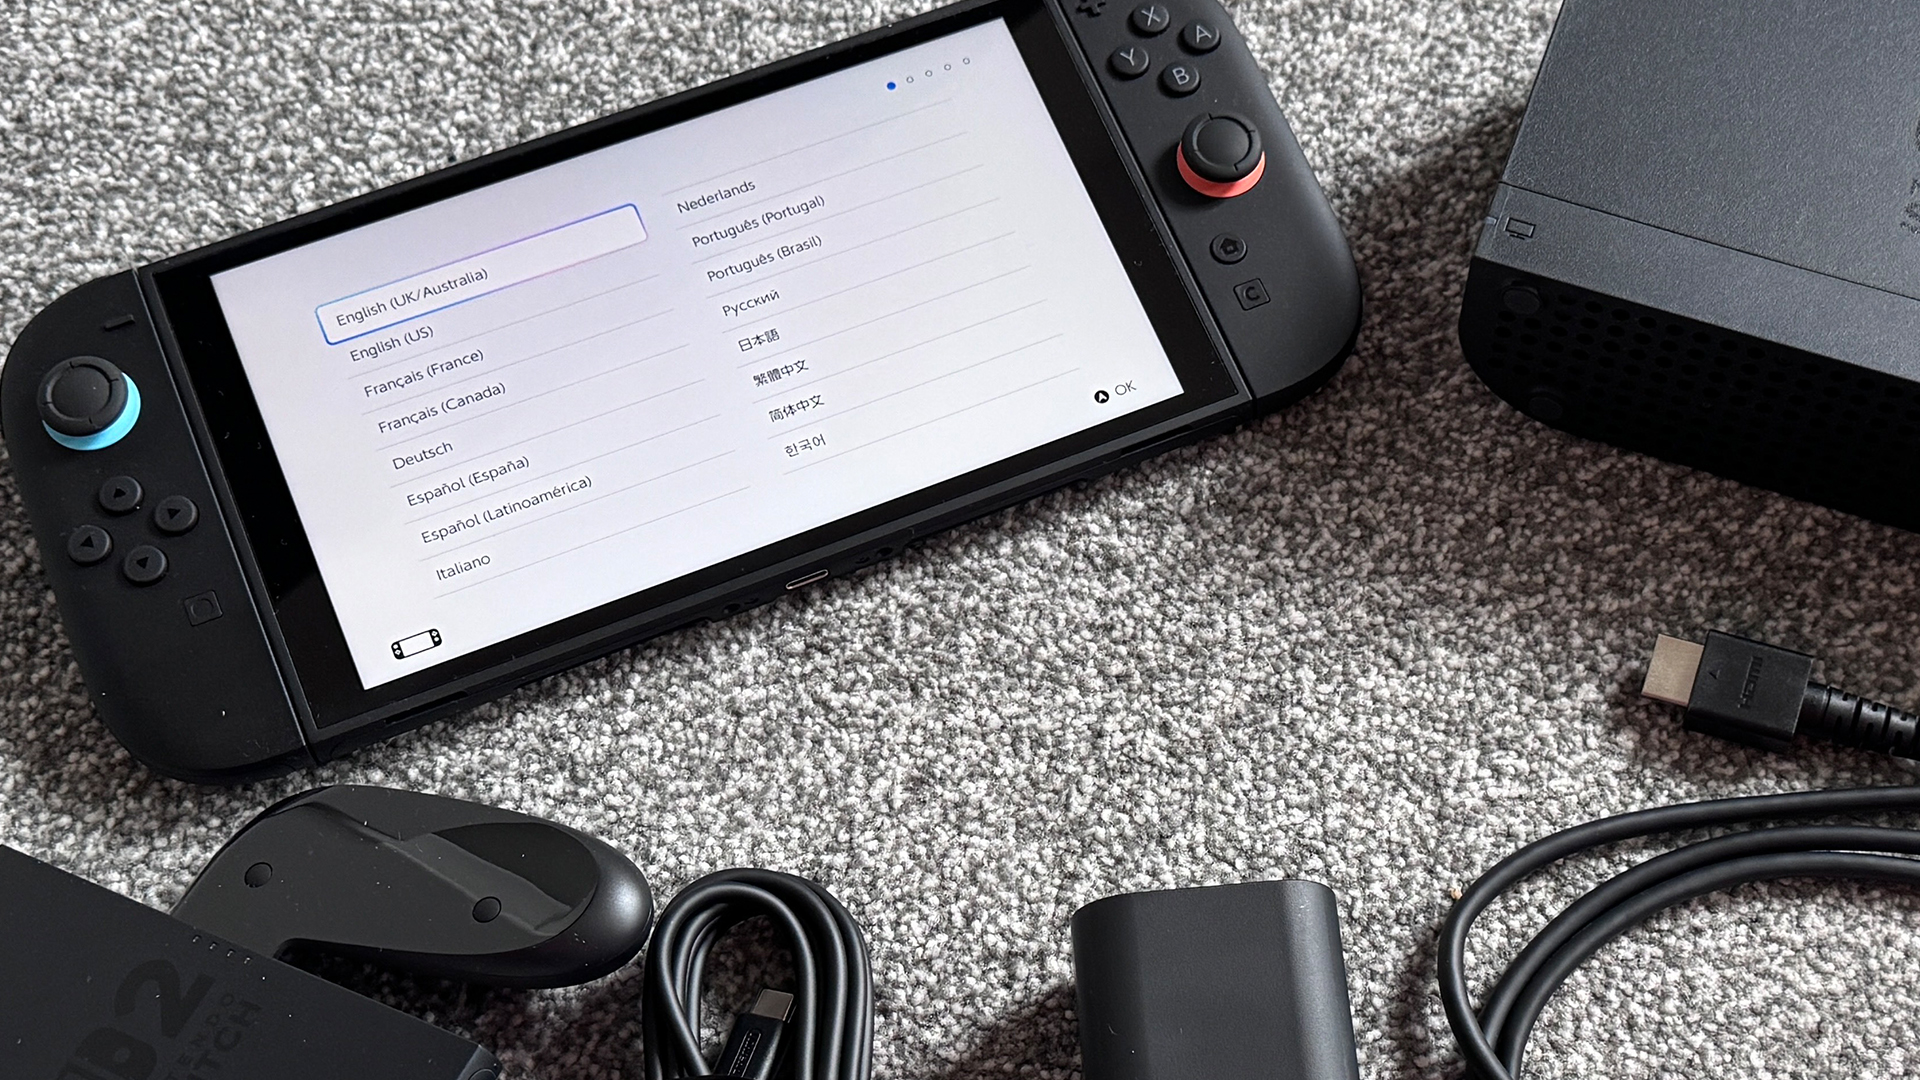
2. Power up and start setting up
 (Photo: © Future)
Press the power button on the top left-hand corner to begin setup. Choose language and region for console display and eShop. Don't forget to read the important information document when prompted.
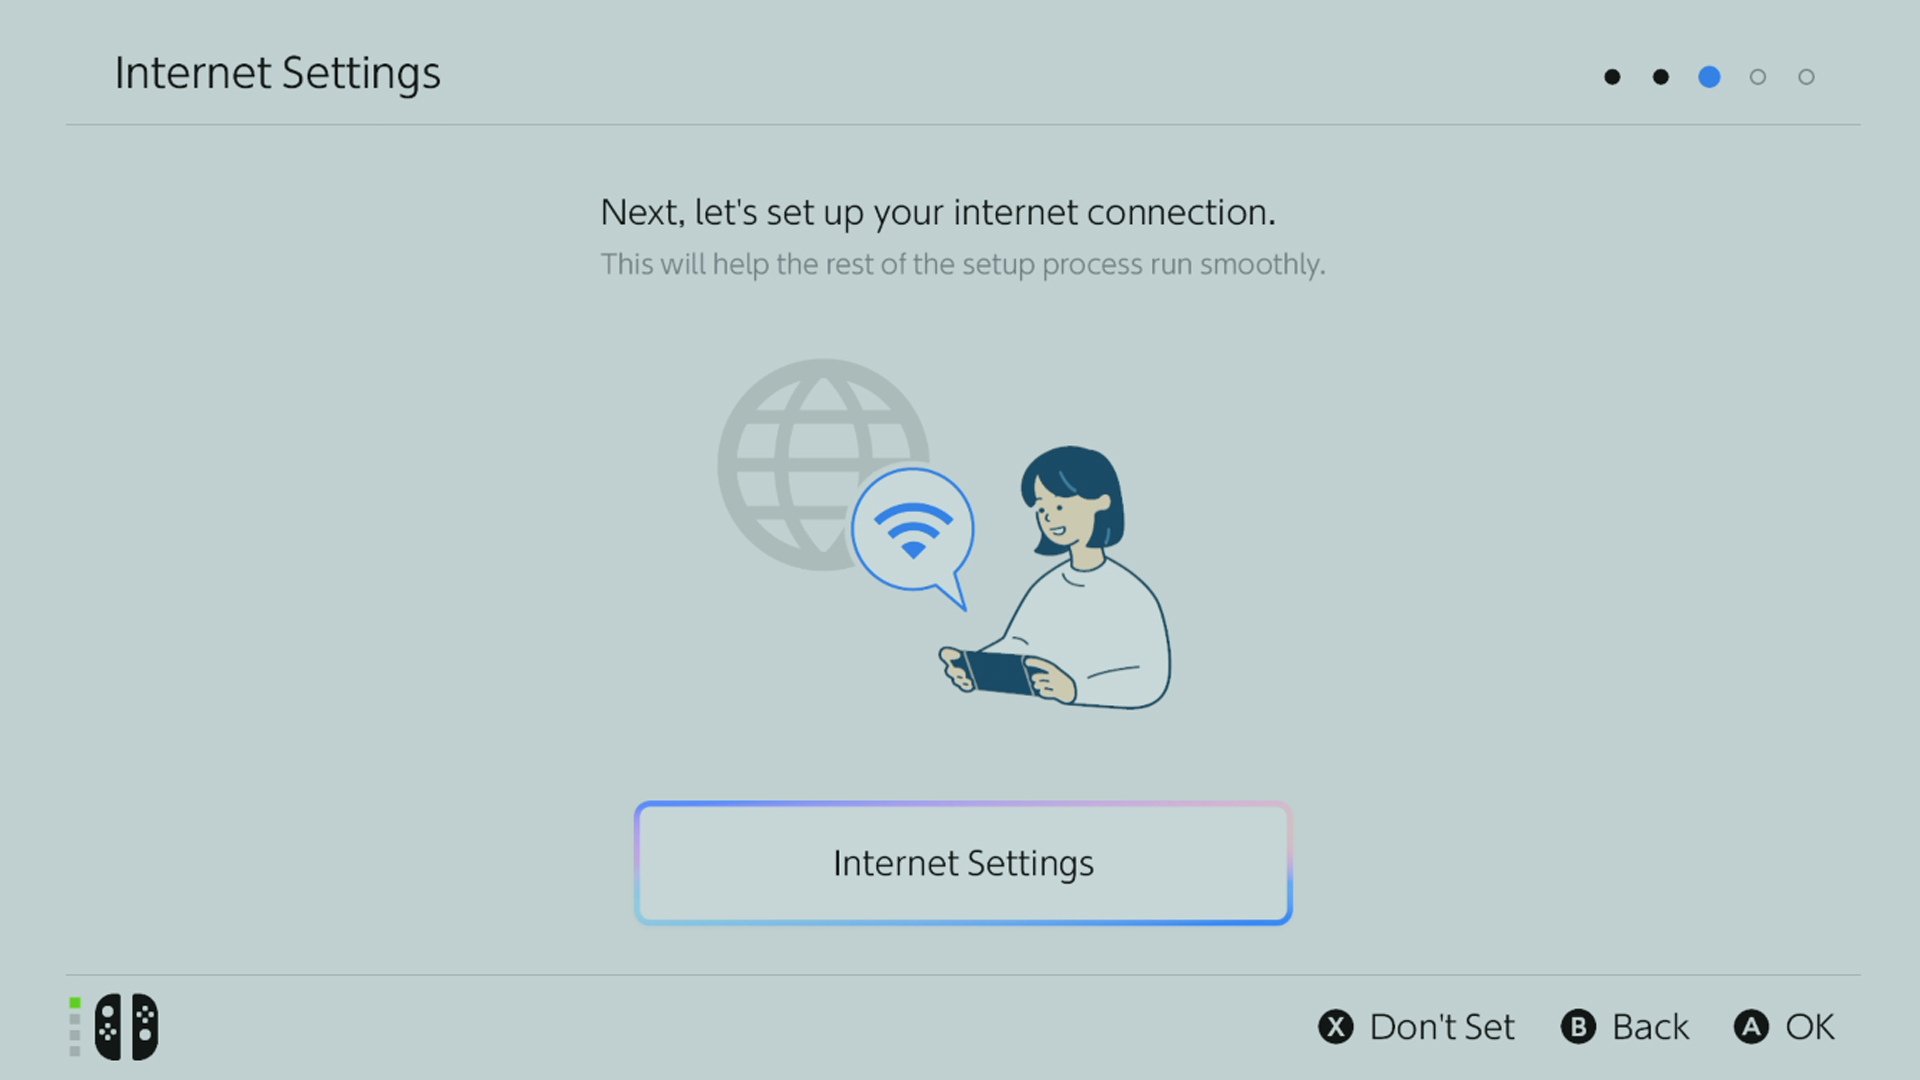
3. Set up internet connection
 (Photo: © Nintendo)
Set up internet connection with password, touch screen makes process easy. Day one System Update starts in background. Choose Switch 2's clock time zone.
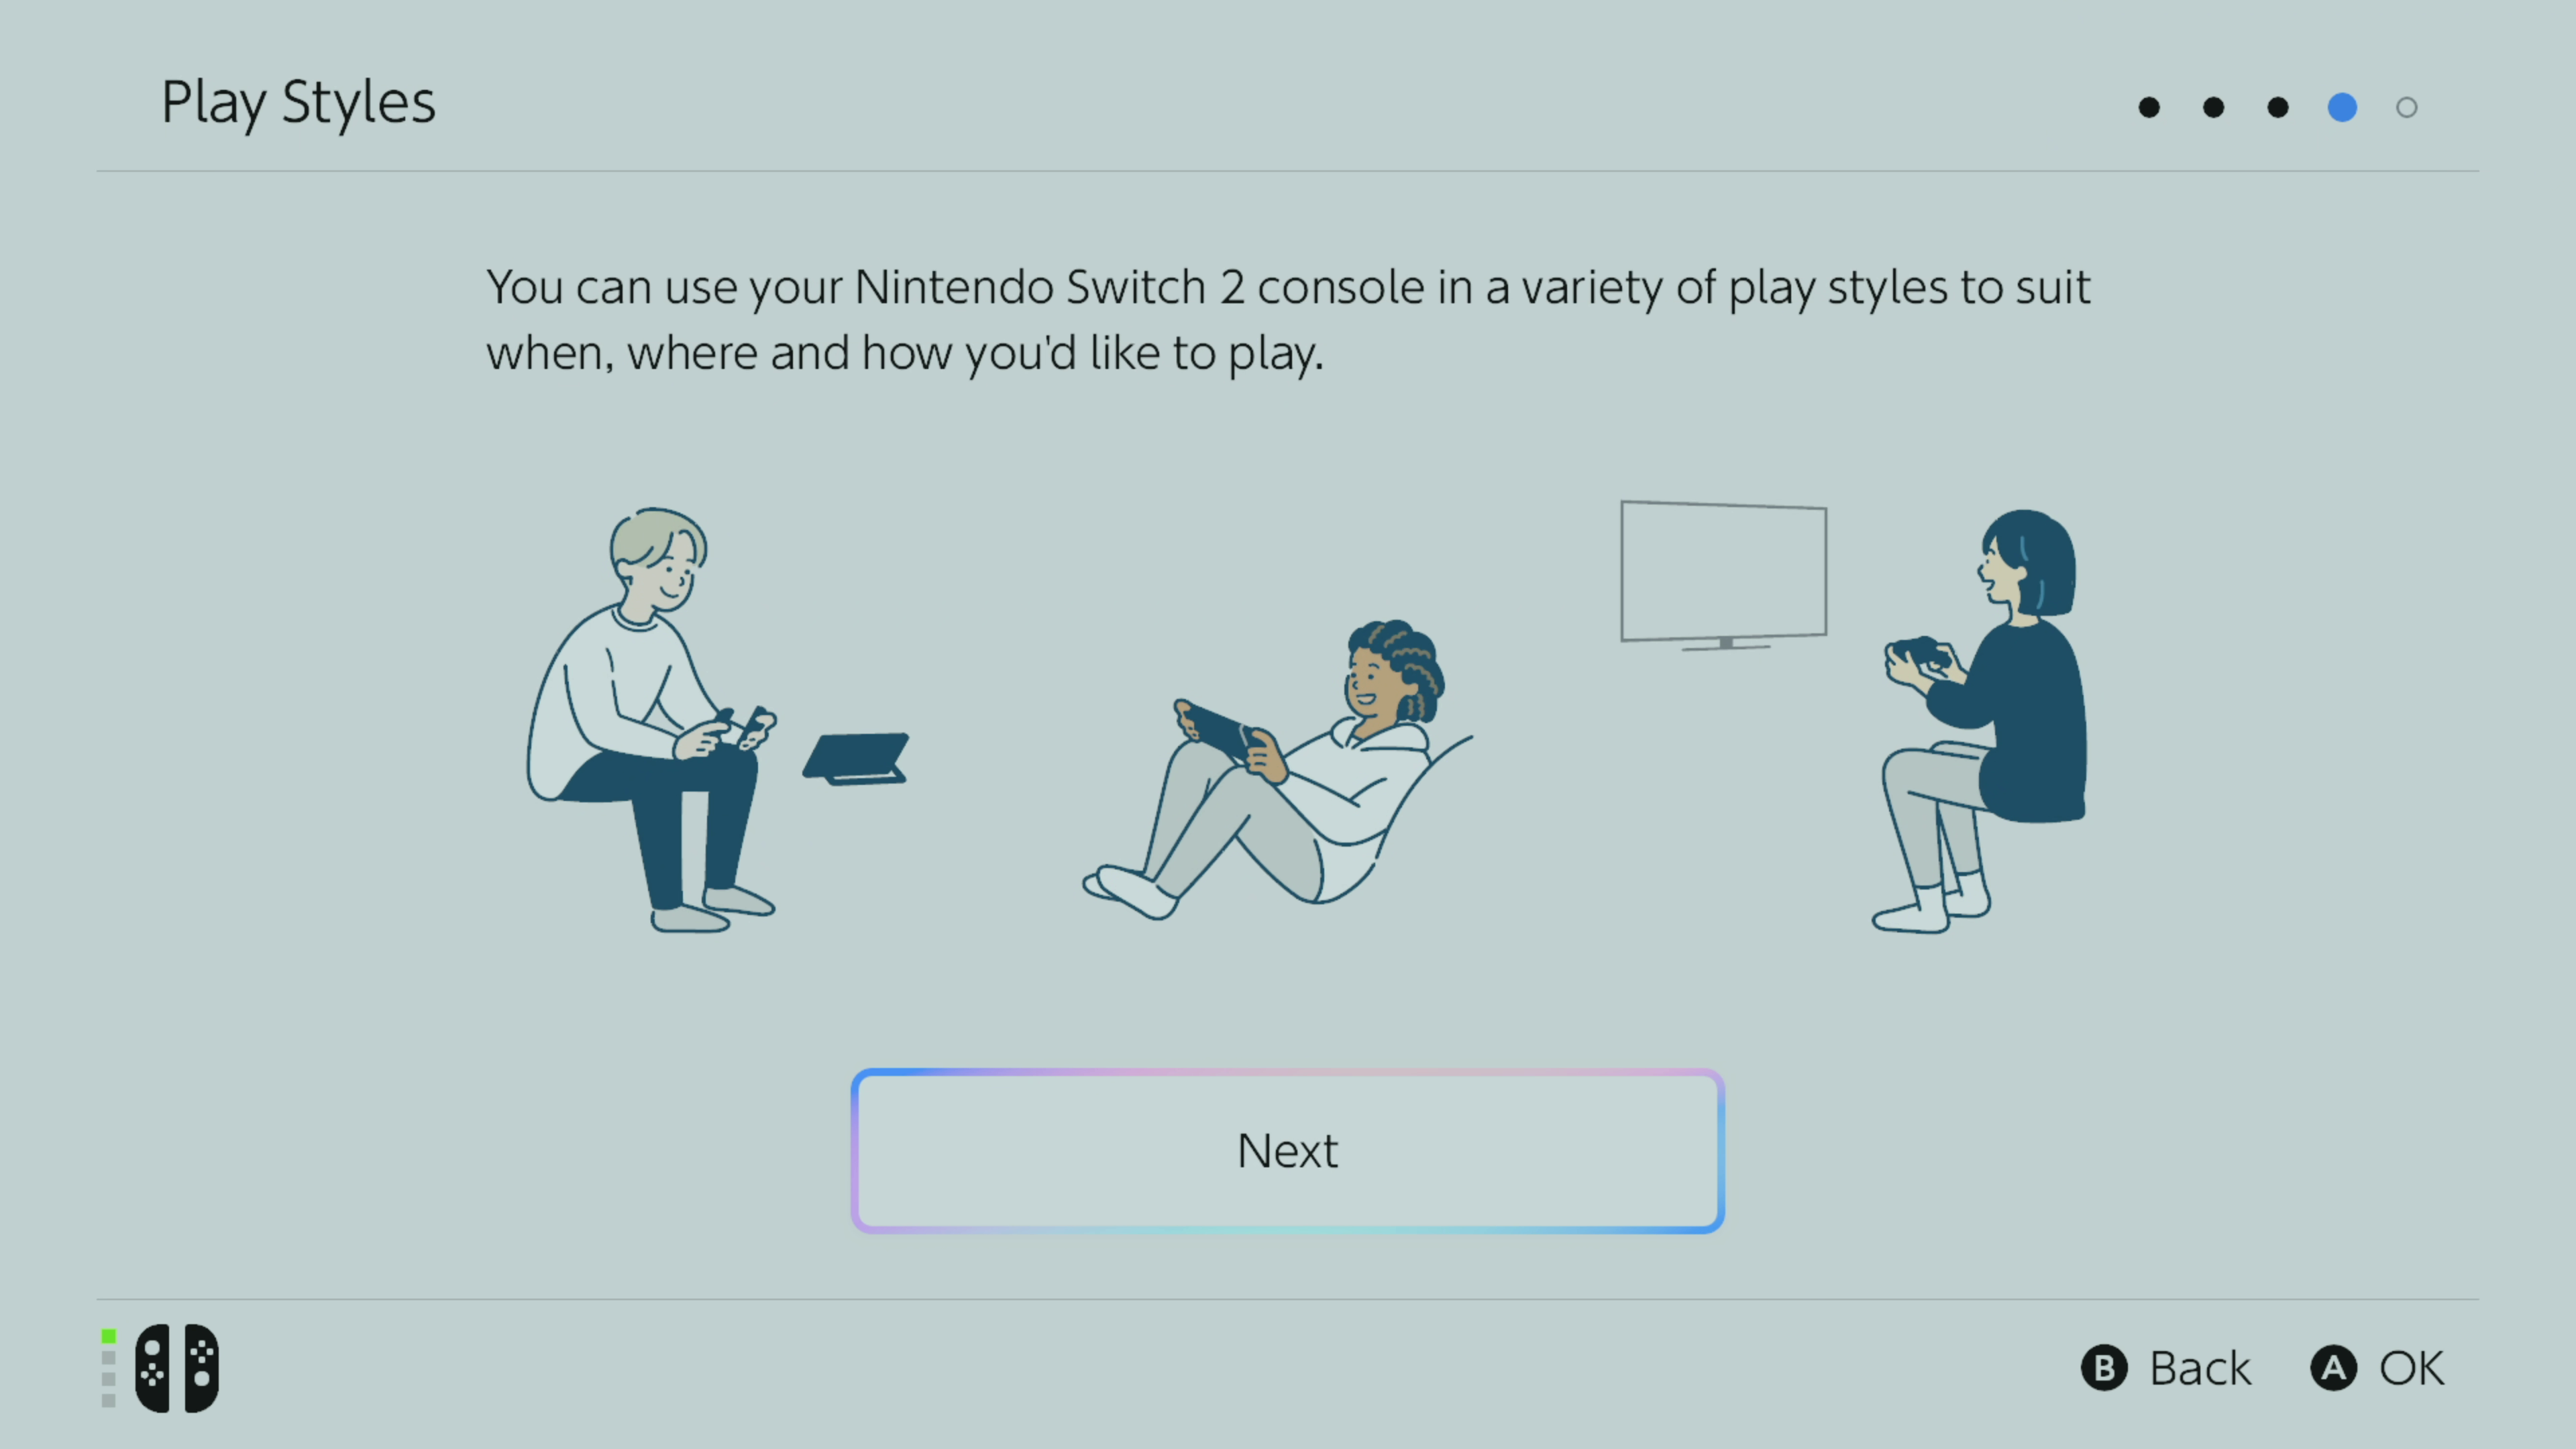
4. Explore Switch 2 playstyles
 (Photo: © Nintendo)
Learn the Play Styles for Nintendo Switch 2 - handheld, tabletop, or docked. Also, detach Joy-Con 2 by pressing buttons. Guide included for safety wrist straps.
5. Connect to Switch 2 Dock
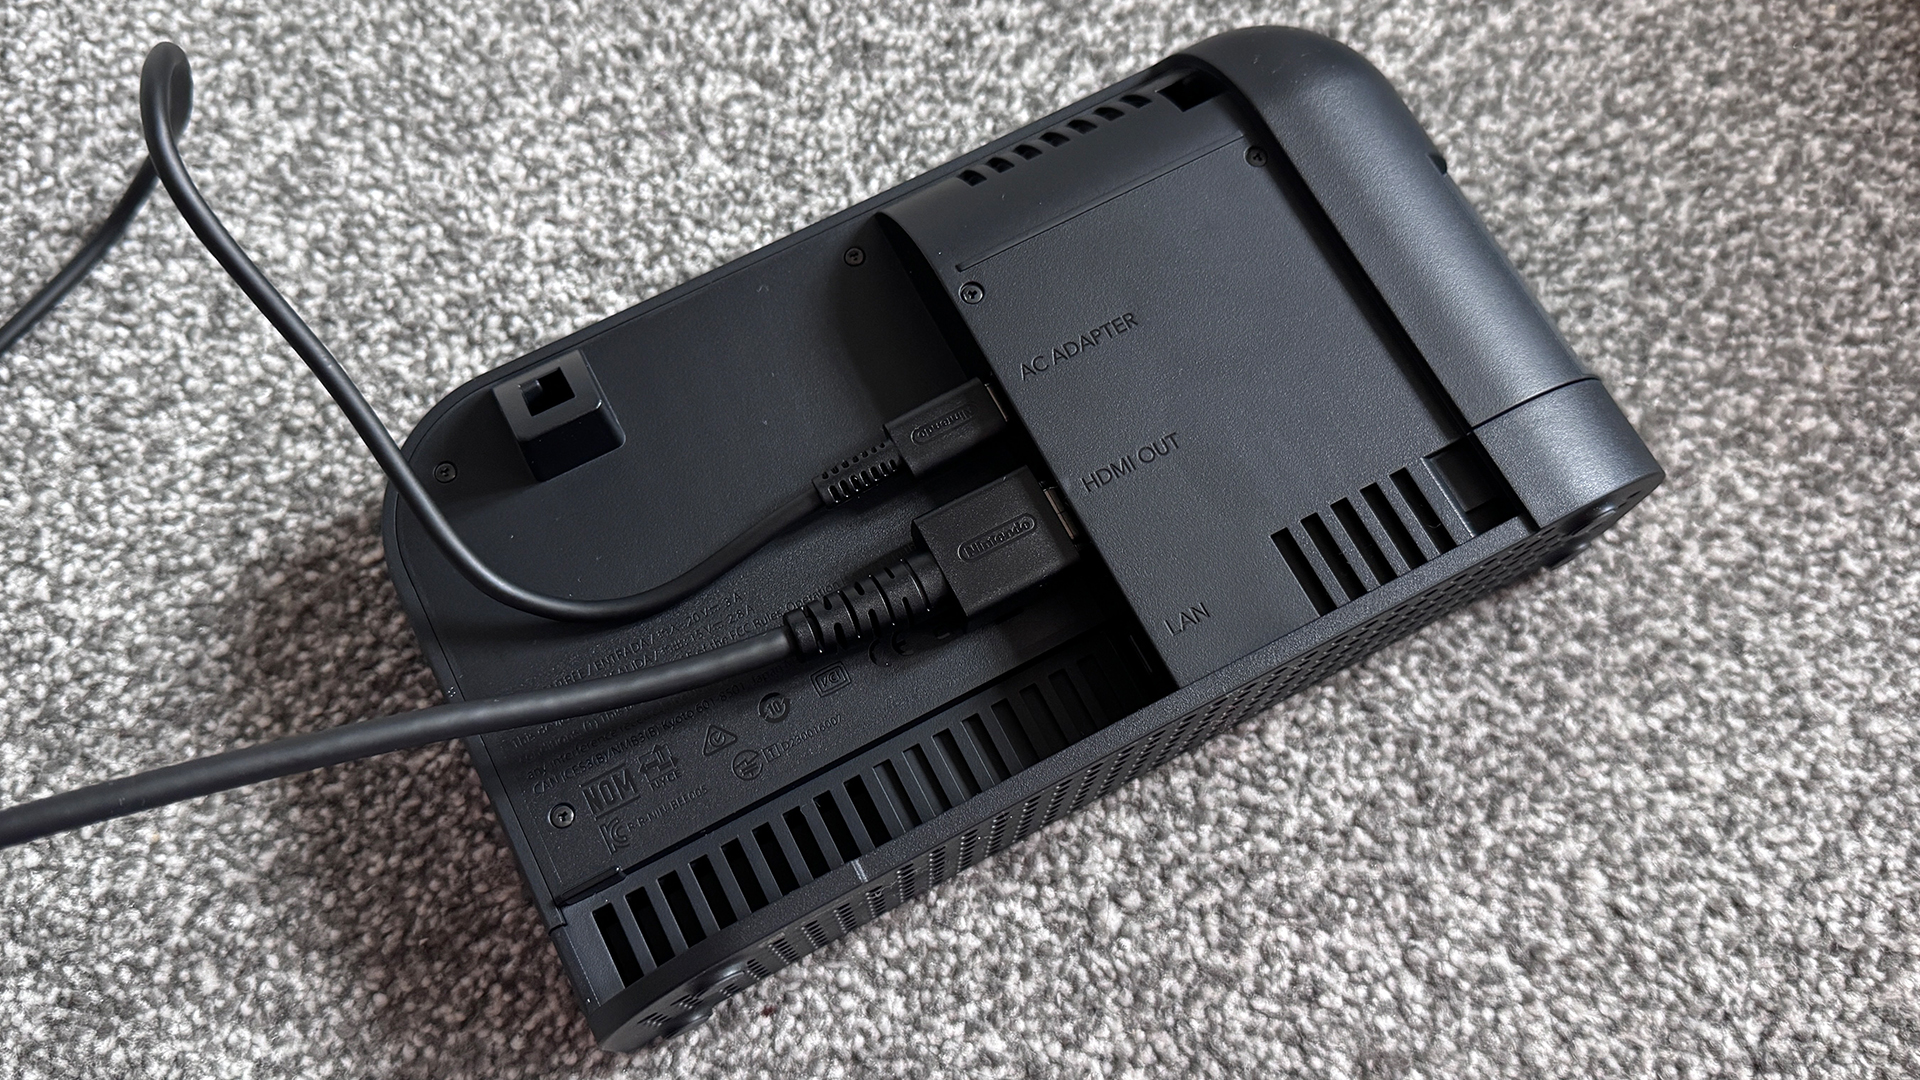 (Photo: © Future)
Connect your Switch 2 dock by detaching the rear panel, attaching the USB-C power adapter and HDMI, then reattaching the rear panel. Align it at the bottom and hinge it up. Connect to your TV and power.
6. Transfer your old Switch data
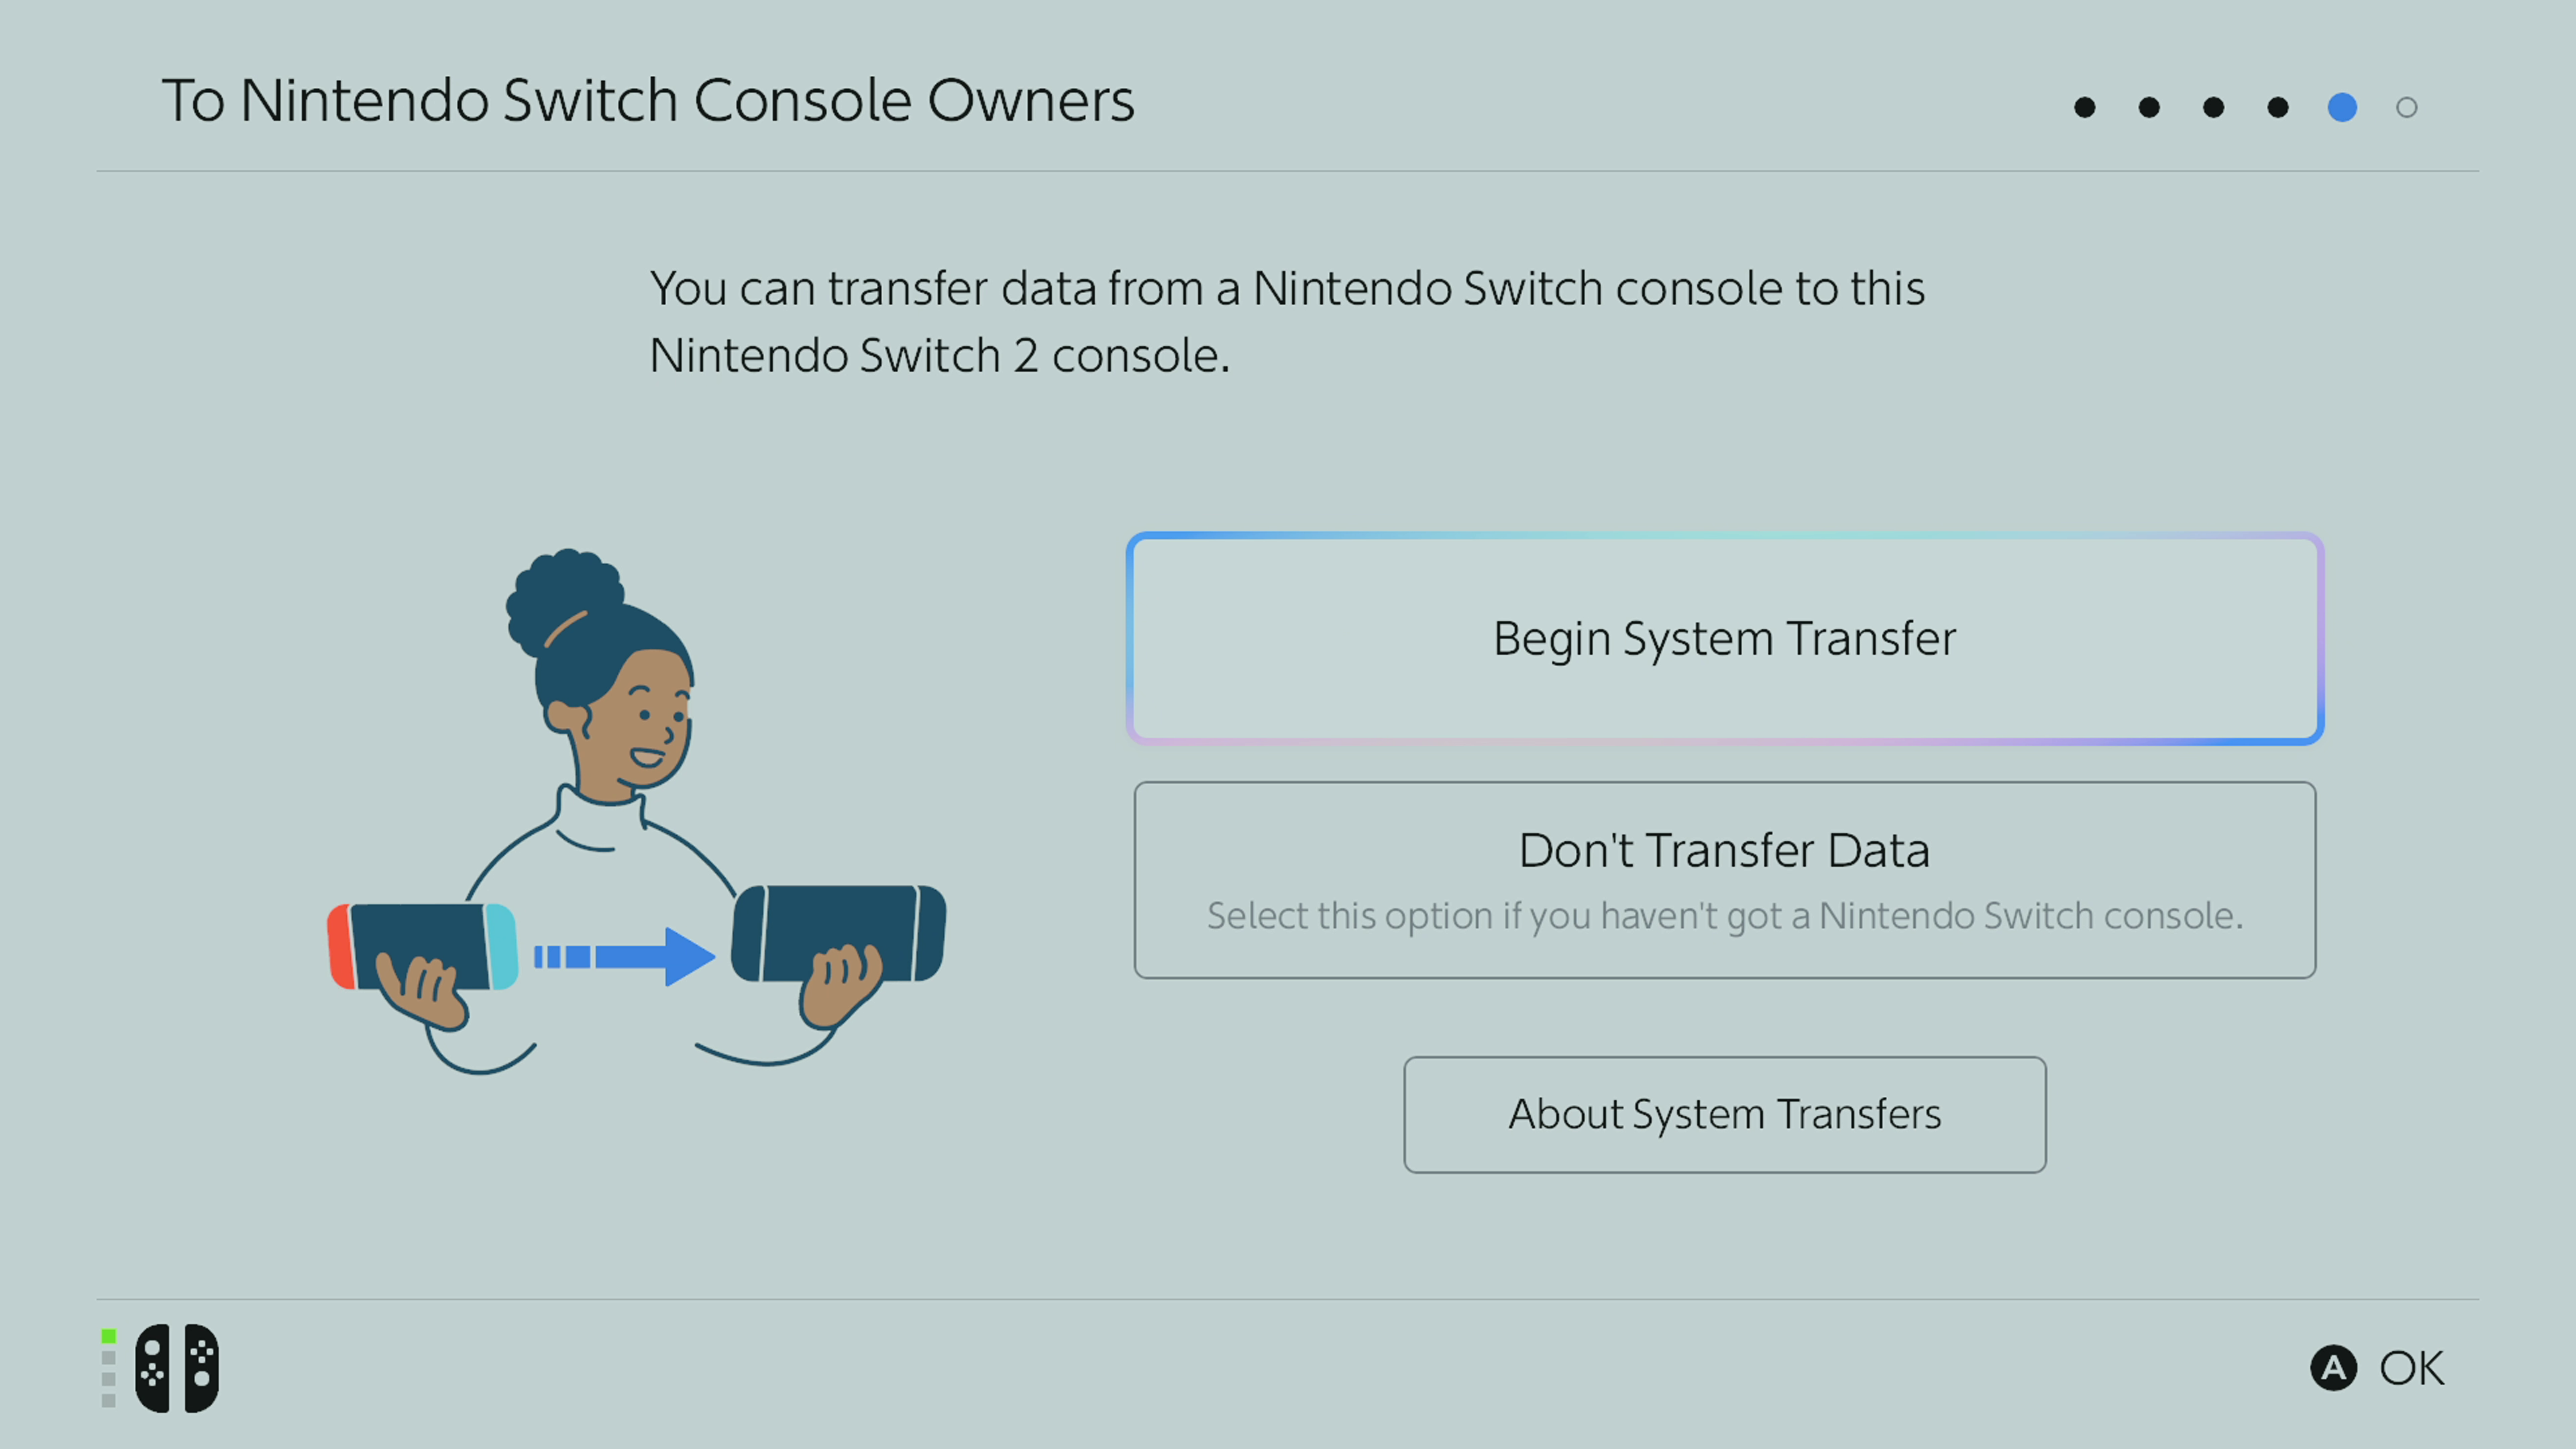 (Photo: © Nintendo)
Transfer data from your original Switch or Switch OLED to a new Switch 2. Add a microSD card if you have one.
Sign into your Nintendo Account by scanning a QR code and entering the 5-digit verification code on your Switch 2.
Bring your old Switch and new Switch 2 close together to transfer data.
On your old Switch, go to System Settings > System > System Transfer and then follow the prompts until you see "Searching for the Nintendo Switch 2 console".
The transfer will begin after 'Start Receiving Data' is initiated on Switch 2. You will be ready to proceed shortly.
You can choose not to transfer your data to your new Switch if you prefer. Just select 'Don't Transfer Data' and sign into your Nintendo Account or create a new one.
7. Add microSD card for extra storage
 (Photo: © Future)
Insert a compatible express microSD card for storing games on the Switch 2. Make sure the microSD card is marked with "express or EX".
To insert the microSD card, locate the slot under the stand at the back of the console.
Get ready to start using your Nintendo Switch 2 today!